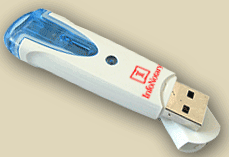
Can I Use Android Phone as Smart Card Reader
Today I had troubles with my Omnikey CardMan 6121 smart card reader.
For some reason it will not detect the card inside and was unusable.
/var/log/messages was filled with Card Not Powered messages:
Dec 18 11:17:55 localhost pcscd: eventhandler.c:292:EHStatusHandlerThread() Error powering up card: -2146435050 0x80100016
Dec 18 11:18:01 localhost pcscd: winscard.c:368:SCardConnect() Card Not Powered
Dec 18 11:18:02 localhost pcscd: winscard.c:368:SCardConnect() Card Not Powered
I've found the solution in RHBZ #531998.
I've found the problem, and it's purely mechanical. Omnikey has simply screwed up when they designed this reader. When the reader is inserted into the ExpressCard slot, it gets slightly compressed. This is enough to trigger the mechanical switch that detects insertions. If I jam something in there and force it apart, then pcscd starts reporting that the slot is empty.
Pierre Ossman, https://bugzilla.redhat.com/show_bug.cgi?id=531998#c12
So I tried moving the smart card a millimeter back and forth inside the reader and that fixed it for me.
This smart card is standard SIM size and I wonder if it is possible to use dual SIM smart phones and tablets as a reader? I will be happy to work on the software side if there is an open source project already (e.g. OpenSC + drivers for Android). If not, why not?
If you happen to have information on the subject please share it in the comments. Thanks!
There are comments.
Red Hat's Bugzilla Hits One Million Bugs

Red Hat's Bugzilla passed the 1 million bugs milestone yesterday! RHBZ #1000000 has been filed by Anton Arapov, a kernel engineer and a very nice guy (I know him btw). I've filed several bugs yesterday but the last one was #999941. A bit too short!
To celebrate this event I dare you to pick some bugs from Bugzilla that you find interesting or frustrating and I will try to analyze and explain them from a QA engineer's point of view. Since I've reported over 1000 bugs and been involved in another close to 5000 I think I will be able to answer almost any question.
Challenge accepted!
There are comments.
Tip: How to Find Your Red Hat Account Number

One thing you need to know when ordering Red Hat subscriptions is your account number. It is available in the drop down menu at the top right corner after you login at https://access.redhat.com.
New accounts don't have an account number. It will be generated after the first subscription activation.
If you need to know more about Red Hat's ordering process just ask me!
There are comments.
SSH from Linux to BlackBerry Z10
You can SSH into a BlackBerry Z10 device even on Linux. I'm using Red Hat Enterprise Linux 6 and here is how to establish the connection.
1) Enable USB networking between your Linux desktop and the Z10;
2) Install the Momentics IDE. You need it to create debug tokens and to start the SSH daemon on the device;
3) Obtain signing keys and create a debug token by following the wizard in the IDE. I just started a new project and followed the instructions;
4) Install debug token on device using the IDE. From Window -> Preferences select
Blackberry -> Signing. Just create and deploy the debug token on the device. Mine was
automatically discovered so I just had to follow the prompts;
5) Reboot and re-enable development mode (I'm not sure if this was necessary);
6) Generate a 4096 bit key for SSH. Smaller keys won't work. You can use your current key if it is 4096 bit;
$ ssh-keygen -t rsa -b 4096
Generating public/private rsa key pair.
Enter file in which to save the key (/home/atodorov/.ssh/id_rsa): /home/atodorov/.rim/testKey_4096_rsa
/home/atodorov/.rim/testKey_4096_rsa already exists.
Overwrite (y/n)? y
Enter passphrase (empty for no passphrase):
Enter same passphrase again:
Your identification has been saved in /home/atodorov/.rim/testKey_4096_rsa.
Your public key has been saved in /home/atodorov/.rim/testKey_4096_rsa.pub.
The key fingerprint is:
77:73:55:03:e1:fc:5b:df:a6:e9:2c:b4:d4:1e:0c:b2 atodorov@redbull.mini
The key's randomart image is:
+--[ RSA 4096]----+
|             oo..|
|            o   o|
|             o  .|
|          . . .. |
|        S .oo+...|
|         .E.oo+ =|
|           o o o+|
|            o..+ |
|             o=  |
+-----------------+
7) Update key permissions, since ssh complains:
$ chmod 600 ~/.rim/testKey_4096_rsa.pub
8) By default SSH is not listening on your BlackBerry. Use the blackberry-connect
command to start the SSH daemon on the device. It will upload your public SSH key
to the device and start the SSH daemon on the other side. password is your device
password;
$ pwd
/home/atodorov/bbndk/host_10_1_0_231/linux/x86/usr/bin

$ ./blackberry-connect 169.254.0.1 -password 123456 -sshPublicKey ~/.rim/testKey_4096_rsa.pub
Info: Connecting to target 169.254.0.1:4455
Info: Authenticating with target 169.254.0.1:4455
Info: Encryption parameters verified
Info: Authenticating with target credentials.
Info: Successfully authenticated with target credentials.
Info: Sending ssh key to target 169.254.0.1:4455
Info: ssh key successfully transferred.
Info: Successfully connected. This application must remain running in order to use debug tools. Exiting the application will terminate this connection.
9) Check if SSH is running on the device
$ nmap 169.254.0.1

Starting Nmap 5.51 ( http://nmap.org ) at 2013-07-18 10:19 EEST
Stats: 0:00:01 elapsed; 0 hosts completed (1 up), 1 undergoing Connect Scan
Connect Scan Timing: About 14.30% done; ETC: 10:20 (0:00:06 remaining)
Nmap scan report for 169.254.0.1
Host is up (0.00097s latency).
Not shown: 991 closed ports
PORT     STATE SERVICE
22/tcp   open  ssh
80/tcp   open  http
139/tcp  open  netbios-ssn
443/tcp  open  https
445/tcp  open  microsoft-ds
1111/tcp open  lmsocialserver
5555/tcp open  freeciv
8000/tcp open  http-alt
8443/tcp open  https-alt

Nmap done: 1 IP address (1 host up) scanned in 12.47 seconds
10) Use SSH with the specified key to connect to the Z10. Username is devuser.
Here's a simple session:
$ ssh -i ~/.rim/testKey_4096_rsa devuser@169.254.0.1
$
$ pwd
/accounts/devuser
$ uname -a
QNX atodorovZ10 8.0.0 2013/05/02-08:42:48EDT OMAP4470_ES1.0_HS_London_Rev:08 armle
$ date
Fri Jul 19 23:39:19 EEST 2013
$ ifconfig
lo0: flags=8049<UP,LOOPBACK,RUNNING,MULTICAST> mtu 33192
    inet 127.0.0.1 netmask 0xff000000
    inet6 ::1 prefixlen 128
    inet6 fe80::1%lo0 prefixlen 64 scopeid 0x1
tiw_drv0: flags=8c02<BROADCAST,OACTIVE,SIMPLEX,MULTICAST> mtu 1500
    address: 1c:69:a5:d0:10:cd
tiw_sta0: flags=40008c43<UP,BROADCAST,RUNNING,OACTIVE,SIMPLEX,MULTICAST,ACCEPTRTADV> mtu 1500
    address: 1c:69:a5:d0:10:cd
    inet 192.168.0.100 netmask 0xffffff00 broadcast 192.168.0.255
    inet6 fe80::1e69:a5ff:fed0:10cd%tiw_sta0 prefixlen 64 scopeid 0x12
tiw_p2pdev0: flags=8c02<BROADCAST,OACTIVE,SIMPLEX,MULTICAST> mtu 1500
    address: 1c:69:a5:d0:10:cd
tiw_p2pgrp0: flags=8c02<BROADCAST,OACTIVE,SIMPLEX,MULTICAST> mtu 1500
    address: 1c:69:a5:d0:10:cd
tiw_ibss0: flags=8c02<BROADCAST,OACTIVE,SIMPLEX,MULTICAST> mtu 1500
    address: 1c:69:a5:d0:10:cd
pflog0: flags=0 mtu 33192
lo2: flags=8048<LOOPBACK,RUNNING,MULTICAST> mtu 33192
cellular0: flags=8810<POINTOPOINT,SIMPLEX,MULTICAST> mtu 1500
cellular1: flags=8810<POINTOPOINT,SIMPLEX,MULTICAST> mtu 1500
cellular2: flags=8810<POINTOPOINT,SIMPLEX,MULTICAST> mtu 1500
cellular3: flags=8810<POINTOPOINT,SIMPLEX,MULTICAST> mtu 1500
cellular4: flags=8810<POINTOPOINT,SIMPLEX,MULTICAST> mtu 1500
bptp0: flags=8043<UP,BROADCAST,RUNNING,MULTICAST> mtu 1356
    inet6 fe80::1e69:a5ff:fed0:10cd%bptp0 prefixlen 64 scopeid 0x2d
    inet6 fd02:42ac:77b2:d543:c158:fabb:6276:80e6 prefixlen 8
ecm0: flags=8a43<UP,BROADCAST,RUNNING,ALLMULTI,SIMPLEX,MULTICAST> mtu 1500
    address: 1e:69:a5:d0:10:cd
    inet 169.254.0.1 netmask 0xfffffffc broadcast 169.254.0.3
    inet6 fe80::1c69:a5ff:fed0:10cd%ecm0 prefixlen 64 scopeid 0x2e
IMPORTANT: you can also use the WiFi address of the device to pass to
backberry-connect and ssh. It works for me.
I'm starting to explore the dark world of QNX in the next couple of days and will keep you posted! Until then - happy hacking.
There are comments.
Tip: How To Enable USB Networking Between BlackBerry Z10 and Red Hat Enterprise Linux 6
On Linux there is a feature called USB networking which provides you with a TCP/IP connection to another device connected via USB cable. Here is how to connect your BlackBerry Z10 to your Linux laptop over USB. I use Red Hat Enterprise Linux but should work out of the box for other distros too.
Connect the Z10 to your laptop:
    $ lsusb
    Bus 001 Device 005: ID 0fca:8020 Research In Motion, Ltd. Blackberry Playbook (CD-Rom mode)
By default many USB devices will present a virtual CD-ROM with drivers for Windows.
This is the case here too. To change it go to Settings - Storage and Access and
set USB Connection to Connect to Mac!
If necessary plug out and back in the Z10.
    $ lsusb
    Bus 001 Device 007: ID 0fca:8013 Research In Motion, Ltd.

    $ ifconfig
    usb0      Link encap:Ethernet  HWaddr 1E:69:A5:D0:11:0A
              inet addr:169.254.0.2  Bcast:169.254.0.3  Mask:255.255.255.252
              inet6 addr: fe80::1c69:a5ff:fed0:110a/64 Scope:Link
              UP BROADCAST RUNNING MULTICAST  MTU:1500  Metric:1
              RX packets:49 errors:0 dropped:0 overruns:0 frame:0
              TX packets:8 errors:0 dropped:0 overruns:0 carrier:0
              collisions:0 txqueuelen:1000
              RX bytes:16002 (15.6 KiB)  TX bytes:1152 (1.1 KiB)
IMPORTANT: In the same Storage and Access screen scroll down to
USB Mass Storage and turn it Off. If you don't do this your Z10 will appear
as USB flash drive and no USB networking will be available. This is how it looks:
    $ lsusb
    Bus 001 Device 008: ID 0fca:8014 Research In Motion, Ltd.
IMPORTANT: If you need your Z10 storage accessible together with USB networking
you can try accessing the device over Wi-Fi.
Configure it from the same Storage and Access screen. Then your device will be
available through Samba on its wireless IP address. I've tried it, works for me!
You don't need anything else to get this working. All set!
My intention is to use either USB networking or Wi-Fi to connect to the Z10 shell and explore it in more details.
There are comments.
Configuring Anonymous FTP Uploads On Red Hat Enterprise Linux 6
Install related packages and make configuration changes:
yum -y install vsftp policycoreutils-python
sed -i "s/#anon_upload_enable=YES/anon_upload_enable=YES/" /etc/vsftpd/vsftpd.conf
Configure writable directory for uploads:
mkdir /var/ftp/pub/upload
chgrp ftp /var/ftp/pub/upload
chmod 730 /var/ftp/pub/upload
Configure SELinux - this is MISSING from Red Hat's official docs:
setsebool -P allow_ftpd_anon_write=1
semanage fcontext -a -t public_content_rw_t '/var/ftp/pub/upload(/.*)'
chcon -t public_content_rw_t /var/ftp/pub/upload
Start the service:
chkconfig vsftpd on
service vsftpd start
There are comments.
Dual Password Encryption With EncFS On Red Hat Enterprise Linux 6
This article is a step-by-step guide to using two passwords with EncFS. The primary password is required and may be used to secure all data; the secondary password is optional and may be stored on USB stick or other removable media and used to secure more sensitive data.
 The original article in Red Hat's Raleigh HQ!
This article has been originally written for and published by Red Hat Magazine. Here is a shortened version with updated commands for Red Hat Enterprise Linux 6.
Technical Information
EncFS provides an encrypted filesystem in user-space. EncFS provides security against offline attacks like a stolen notebook. EncFS works on files and directories, not an entire block device. It modifies file names and contents. The data is stored on the underlying filesystem and meta-data is preserved. File attributes such as ownership, modification date and permission bits are not encrypted and are visible to anybody. EncFS is acting like a translator between the user and the filesystem, encrypting and decrypting on the fly.
EncFS is easy to use and requires no special setup. A local user has to be in the ‘fuse’ group to use EncFS. It does not require ‘root’ privileges. EncFS can be used with secondary passwords. This could be used to store a separate set of files on the same encrypted filesystem. EncFS ignores files which do not decode properly, so files created with separate passwords will only be visible when the filesystem is mounted with the associated password. There is the option to read passwords from an external program or stdin (standard input). This option combined with custom scripting makes EncFS very flexible. By default, all FUSE based filesystems are visible only to the user who mounted them. No other users (including root) can view the filesystem contents.
Installing EncFS
Install fuse-encfs from EPEL:
# yum install fuse-encfs
Load the FUSE module:
# /sbin/modprobe fuse
And, finally, add any users that will use EncFS to group ‘fuse’:
# usermod -Gfuse jdoe
Using EncFS
Using EncFS does not differ from using any other filesystem. The only thing you need to do is to mount it somewhere and start creating files and directories under the mount point.
Warning: Use only absolute path names with EncFS!
Create working directories:
$ mkdir -p ~/encrypted ~/plain
plain/– looks like a normal directory. All files stored here look like normal files for the user who mounted this directory with EncFS. This acts like a virtual directory performing encryption and decryption.encrypted/– looks garbled. The actual data is stored here and is encrypted.
Now you can mount the new EncFS volume for the first time. This assumes a default configuration:
$ encfs /home/jdoe/encrypted /home/jdoe/plain
Creating new encrypted volume.
Please choose from one of the following options:
 enter "x" for expert configuration mode,
 enter "p" for pre-configured paranoia mode,
 anything else, or an empty line will select standard mode.
?>

Standard configuration selected.

Configuration finished.  The filesystem to be created has
the following properties:
Filesystem cipher: "ssl/aes", version 3:0:2
Filename encoding: "nameio/block", version 3:0:1
Key Size: 192 bits
Block Size: 1024 bytes
Each file contains 8 byte header with unique IV data.
Filenames encoded using IV chaining mode.
File holes passed through to ciphertext.

Now you will need to enter a password for your filesystem.
You will need to remember this password, as there is absolutely
no recovery mechanism.  However, the password can be changed
later using encfsctl.

New Encfs Password: **********
Verify Encfs Password: **********
Create a file:
$ echo "some content" > ~/plain/file.one
Check contents in plain/:
$ ls -la ~/plain/
total 12
drwxrwxr-x. 2 jdoe jdoe 4096 May 14 21:31 .
drwx------. 6 jdoe jdoe 4096 May 14 21:29 ..
-rw-rw-r--. 1 jdoe jdoe   13 May 14 21:31 file.one

$ cat ~/plain/file.one
some content
Check what’s in encrypted/:
$ ls -la ~/encrypted/
total 16
drwxrwxr-x. 2 jdoe jdoe 4096 May 14 21:31 .
drwx------. 6 jdoe jdoe 4096 May 14 21:29 ..
-rw-rw-r--. 1 jdoe jdoe 1083 May 14 21:30 .encfs6.xml
-rw-rw-r--. 1 jdoe jdoe   21 May 14 21:31 Wq5NZ6q-yP-fYNWYsjzFhHf9
Warning: .encfs6.xml is a special file. When performing backups or restoring data,
make sure to keep this file!
Inspect the contents of encrypted file:
$ cat ~/encrypted/Wq5NZ6q-yP-fYNWYsjzFhHf9
���r�N�M���"p��
Unmount the filesystem and mount it again with another password:
$ fusermount -u ~/plain/
$ encfs --anykey /home/jdoe/encrypted /home/jdoe/plain
EncFS Password: *****
Caution: We are using the --anykey option to allow secondary passwords.
Check plain/ again. The directory is empty. Previous files were not decoded with the new password.
$ ls -la ~/plain/
total 8
drwxrwxr-x. 2 jdoe jdoe 4096 May 14 21:31 .
drwx------. 6 jdoe jdoe 4096 May 14 21:29 ..
Now create another file that will be in “hidden” mode:
$ echo "hidden contents" > ~/plain/file.two
Check again what’s in encrypted/. Both files are stored in the same directory:
$ ls -la ~/encrypted/
total 20
drwxrwxr-x. 2 jdoe jdoe 4096 May 14 21:35 .
drwx------. 6 jdoe jdoe 4096 May 14 21:29 ..
-rw-rw-r--. 1 jdoe jdoe 1083 May 14 21:30 .encfs6.xml
-rw-rw-r--. 1 jdoe jdoe   24 May 14 21:35 PfkZHs16YsKkznnTujaVsOuS
-rw-rw-r--. 1 jdoe jdoe   21 May 14 21:31 Wq5NZ6q-yP-fYNWYsjzFhHf9
Unmount and mount again using the first password:
$ fusermount -u ~/plain/
$ encfs --anykey /home/jdoe/encrypted /home/jdoe/plain
EncFS Password: **********
Inspect the contents of plain/ again. The second file was not decoded properly and is not shown:
$ ls -la ~/plain/
total 12
drwxrwxr-x. 2 jdoe jdoe 4096 May 14 21:35 .
drwx------. 6 jdoe jdoe 4096 May 14 21:29 ..
-rw-rw-r--. 1 jdoe jdoe   13 May 14 21:31 file.one
Summary
You have learned how to use encryption to protect your data. There is also a nice graphical application for using EncFS with KDE called K-EncFS. I'll be happy to answer any questions or comments.
There are comments.
Virtualization Platforms Supported by Red Hat Enterprise Linux
This is mostly for my own reference, to have a handy list of supported virtualization platforms by Red Hat Enterprise Linux.
Software virtualization solutions
A guest RHEL operating system is supported if it runs on the following platforms:
- Xen shipped with RHEL Server
- KVM shipped with RHEL Server or RHEV for Servers
- VMware ESX/vSphere
- Microsoft Hyper-V
Red Hat does not support Citrix XenServer. However, customers can buy RHEL Server and use it with Citrix XenServer with the understanding that Red Hat will only support technical issues that can be reproduced on bare metal.
The official virtualization support matrix shows which host/guest operating systems combinations are supported.
Hardware partitioning
Red Hat supports RHEL on hardware partitioning and virtualization solutions such as:
Unfortunately the recently updated hardware catalog doesn't allow to filter by hardware partitioning vs. virtualization platform so you need to know what you are looking for to find it :(.
Red Hat Enterprise Linux as a guest on the Cloud
Multiple public cloud providers are supported. Comprehensive list can be found here: http://www.redhat.com/solutions/cloud-computing/public-cloud/find-partner/
You can also try Red Hat Partner Locator's advanced search. However at the time of this writing there are no partners listed in the Cloud / Virtualization category.
Warning: It is known that Amazon uses Xen with custom modifications (not sure what version) and HP Cloud uses KVM but there is not much public record about hypervisor technology used by most cloud providers. Red Hat has partner agreements with these vendors and will commercially support only their platforms. This means that if you decide to use upstream Xen or anything else not listed above, you are on your own. You have been warned!
Unsupported but works
I'm not a big fan of running on top of unsupported environments and I don't have the need to do so. I've heard about people running CentOS (RHEL compatible) on VirtualBox but I have no idea how well it works.
If you are using a different virtualization platform
(like LXC, OpenVZ, UML,
Parallels
or other) let me know if CentOS/Fedora works on it.
Alternatively I can give it a try if you can provide me with ssh/VNC access to the machine.
There are comments.
Secure VNC Installation of Red Hat Enterprise Linux 6
 Image CC-BY-SA,
Red Hat
Image CC-BY-SA,
Red Hat
From time to time I happen to remotely install Red Hat Enterprise Linux servers via the Internet. When the system configuration is not decided upfront you need to use interactive mode. This means VNC in my case.
In this tutorial I will show you how to make VNC installations more secure when using public networks to connect to the server.
Meet your tools
Starting with Red Hat Enterprise Linux 6 and all the latest Fedora releases, the installer supports SSH connections during install.
Note that by default, root has a blank password.
If you don't want any user to be able to ssh in and have full access to your hardware, you must specify sshpw for username root. Also note that if Anaconda fails to parse the kickstart file, it will allow anyone to login as root and have full access to your hardware.
Fedora Kickstart manual https://fedoraproject.org/wiki/Anaconda/Kickstart#sshpw
Preparation
We are going to use SSH port forwarding and tunnel VNC traffic through it. Create a kickstart file as shown below:
install
url --url http://example.com/path/to/rhel6
lang en_US.UTF-8
keyboard us
network --onboot yes --device eth0 --bootproto dhcp
vnc --password=s3cr3t
sshpw --user=root s3cr3t
The first 5 lines configure the loader portion of the installer. They will setup networking and fetch the installer image called stage2. This is completely automated. NB: If you miss some of the lines or have a syntax error the installer will prompt for values. You either need a remote console access or somebody present at the server console!
The last 2 lines configure passwords for VNC and SSH respectively.
Make this file available over HTTP(S), FTP or NFS.
NB: Make sure that the file is available on the same network where your server is, or use HTTPS if on public networks.
Installation
Now, using your favorite installation media start the installation process like this:
boot: linux sshd=1 ks=http://example.com/ks.cfg
After a minute or more the installer will load stage2, with the interactive VNC session. You need to know the IP address or hostname of the server. Either look into DHCP logs, have somebody look at the server console and tell you that (it's printed on tty1) or script it in a %pre script which will send you an email for example.
When ready, redirect one of your local ports through SSH to the VNC port on the server:
$ ssh -L 5902:localhost:5901 -N root@server.example.com
Now connect to DISPLAY :2 on your system to begin the installation:
$ vncviewer localhost:2 &
Warning Bugs Present
As it happens, I find bugs everywhere. This is no exception. Depending on your network/DHCP configuration IP address during install may change mid-air and cause VNC client connection to freeze.
The reason for this bug is evident from the code (rhel6-branch):
if not anaconda.isKickstart:
    self.utcCheckbox.set_active(not hasWindows(anaconda.id.bootloader))
if not anaconda.isKickstart and not hasWindows(anaconda.id.bootloader):
    asUtc = True
Because we are using a kickstart file Anaconda will assume the system clock DOES NOT use UTC. If you forget to configure it manually you may see time on the server shifting back or forward (depending on your timezone) while installing. If your DHCP is configured for short lease time the address will expire before the installation completes. When new address is requested from DHCP it may be different and this will cause your VNC connection to freeze.
To workaround this issue select the appropriate value for the system clock settings during install and possibly use static IP address during the installation.
Feedback
As always I'd love to hear your feedback in the comments section below. Let me know your tips and tricks to perform secure remote installations using public networks.
There are comments.
Mission Impossible - ABRT Bugzilla Plugin on RHEL6
Some time ago Red Hat introduced Automatic Bug Reporting Tool to their Red Hat Enterprise Linux platform. This is a nice tool which lets users report bugs easily to Red Hat. However one of the plugins in the latest version doesn't seem usable at all.
First make sure you have libreport-plugin-bugzilla package installed. This is the plugin to
report bugs directly to Bugzilla. It may not be installed by default
because customers are supposed to report issues to Support first - this is why they pay anyway.
If you are a tech savvy user though, you may want to skip Support and go straight to the developers.
To enable Bugzilla plugin:
- Edit the file
/etc/libreport/events.d/bugzilla_event.confchange the lineEVENT=report_Bugzilla analyzer=libreport reporter-bugzilla -b
to
EVENT=report_Bugzilla reporter-bugzilla -b
-
Make sure ABRT will collect meaningful backtrace. If debuginfo is missing it will not let you continue. Edit the file
/etc/libreport/events.d/ccpp_event.conf. There should be something like this:EVENT=analyze_LocalGDB analyzer=CCpp abrt-action-analyze-core --core=coredump -o build_ids && abrt-action-generate-backtrace && abrt-action-analyze-backtrace ( bug_id=$(reporter-bugzilla -h `cat duphash`) && if test -n "$bug_id"; then abrt-bodhi -r -b $bug_id fi ) -
Change it to look like this - i.e. add the missing
/usr/libexec/line:EVENT=analyze_LocalGDB analyzer=CCpp abrt-action-analyze-core --core=coredump -o build_ids && /usr/libexec/abrt-action-install-debuginfo-to-abrt-cache --size_mb=4096 && abrt-action-generate-backtrace && abrt-action-analyze-backtrace && ( bug_id=$(reporter-bugzilla -h `cat duphash`) && if test -n "$bug_id"; then abrt-bodhi -r -b $bug_id fi )
Supposedly after everything is configured properly ABRT will install missing debuginfo packages, generate the backtrace and let you report it to Bugzilla. Because of bug 759443 this will not happen.
To work around the problem you can try to manually install the missing debuginfo packages. Go to your system profile in RHN and subscribe the system to all appropriate debuginfo channels. Then install the packages. In my case:
# debuginfo-install firefox
And finally - bug 800754 which was already reported!
There are comments.
Combining PDF Files On The Command Line
VERSION
Red Hat Enterprise Linux 6
PROBLEM
You have to create a single PDF file by combining multiple files - for example individually scanned pages.
ASSUMPTIONS
You know how to start a shell and havigate to the directory containing the files.
SOLUTION
If individual PDF files are named, for example, doc_01.pdf, doc_02.pdf, doc_03.pdf,
doc_04.pdf, then you can combine them with the gs command:
$ gs -dBATCH -dNOPAUSE -sDEVICE=pdfwrite -sOutputFile=mydocument.pdf doc_*.pdf
The resulting PDF file will contain all pages from the individual files.
MORE INFO
The gs command is part of the ghostscript rpm package.
You can find more about it using man gs, the documentation file /usr/share/doc/ghostscript-*/index.html
or http://www.ghostscript.com.
There are comments.
Protected RPM repositories with yum and SSL
In this article I'm going to describe a simple way to set-up RPM repositories with access control using only standard tools such as yum, SSL and Apache. I've been talking about this at one of the monthly conferences of Linux for Bulgarians!
Objective:
Create RPM repository with access control. Access is allowed only for some systems and forbidden for the rest. This is a similar to what Red Hat Network does.
Solution:
We're going to use yum and Apache capabilities to work with SSL certificates. The client side (yum) will identify itself using SSL certificate and the server (Apache) will use this information to control the access.
Client side set-up:
- Yum version 3.2.27 or newer supports SSL certificates for client authentication. This version is available in Red Hat Enterprise Linux 6.
-
First you need to generate a private key and certificate using OpenSSL:
# openssl genrsa -out /var/lib/yum/client.key 1024 Generating RSA private key, 1024 bit long modulus ....++++++ .......++++++ e is 65537 (0x10001) # openssl req -new -x509 -text -key /var/lib/yum/client.key -out /var/lib/yum/client.cert You are about to be asked to enter information that will be incorporated into your certificate request. What you are about to enter is what is called a Distinguished Name or a DN. There are quite a few fields but you can leave some blank For some fields there will be a default value, If you enter '.', the field will be left blank. ----- Country Name (2 letter code) [XX]:BG State or Province Name (full name) []:Sofia Locality Name (eg, city) [Default City]:Sofia Organization Name (eg, company) [Default Company Ltd]:Open Technologies Bulgaria Organizational Unit Name (eg, section) []:IT Common Name (eg, your name or your server's hostname) []: Email Address []:no-spam@otb.bg -
For better security you can change file permissions of client.key:
# chmod 600 /var/lib/yum/client.key -
You need to define the protected repository in a .repo file. It needs to look something like this:
# cat /etc/yum.repos.d/protected.repo [protected] name=SSL protected repository baseurl=https://repos.example.com/protected enabled=1 gpgcheck=1 gpgkey=https://repos.example.com/RPM-GPG-KEY sslverify=1 sslclientcert=/var/lib/yum/client.cert sslclientkey=/var/lib/yum/client.key - If you use self-signed server certificate you can specify sslverify=0, but this is not recommended.
Whenever yum tries to reach the URL of the repository it will identify itself using the specified certificate.
Server side set-up:
- Install and configure the mod_ssl module for Apache.
- Create a directory for the repository which will be available over HTTPS.
-
In the repository directory add .htaccess, which looks something like this:
Action rpm-protected /cgi-bin/rpm.cgi AddHandler rpm-protected .rpm .drpm SSLVerifyClient optional_no_ca - The Action and AddHandler directives instruct Apache to run the rpm.cgi CGI script every time someone tries to access files with extension .rpm and .drpm.
- The SSLVerifyClient directive tells Apache that the http client may present a valid certificate but it has not to be (successfully) verifyable. For more information on this configuration please see http://www.modssl.org/docs/2.1/ssl_reference.html#ToC13.
-
The simplest form of rpm.cgi script may look like this:
#!/bin/bash if [ "$SSL_CLIENT_M_SERIAL" == "9F938211B53B4F44" ]; then echo "Content-type: application/x-rpm" echo "Content-length: $(stat --printf='%s' $PATH_TRANSLATED)" echo cat $PATH_TRANSLATED else echo "Status: 403" echo fi - The script will allow access to a client which uses a certificate with serial number 9F938211B53B4F44. Other clients will be denied access and the server will return standard 403 error code.
In practice:
The above set-up is very basic and only demonstrates the technology behind this. In a real world configuration you will need some more tools to make this really usable.
My company Open Technologies Bulgaria, Ltd. has developed a custom solution for our customers based on the above example called Voyager. It features a Drupal module, a CGI script and a client side yum plugin.
The Drupal module acts as web interface to the system and allows some basic tasks. Administrators can define software channels and subscription expiration. Customers can register and entitle their systems to particular channels. The functionality is similar to Red Hat Network but without all the extra features which we don't need.
The CGI script acts as a glue between the client side and the Drupal backend. It will read information about client credentials and act as first line of defence against non-authorized access. Then it will communicate with the Drupal database and get more information about this customer. If everything is OK then access will be allowed.
The yum plugin has the task to communicate with the Drupal backend and dynamically update repository definitions based on available subscriptions. Then it will send a request for the RPM file back to the Apache server where the CGI script will handle it.
The client side also features a tool to generate the client certificate and register the system to the server.
All communications are entirely over HTTPS.
This custom solution has the advantage that it is simple and easy to maintain as well as easy to use. It integrates well with other plugins (e.g. yum-presto for delta rpm support and yum-rhnplugin) and can be used via yum or PackageKit which are the standard package management tools on Red Hat Enterprise Linux 6.
There are comments.
USB multi-seat on Red Hat Enterprise Linux 6
Multiseat configurations are well known in the Linux community and have been used for a number of years now. In the last few years USB docking stations emerged on the market and are becoming popular among multiseat enthusiasts.
My company Open Technologies Bulgaria, Ltd. offers full support of USB multiseat for Red Hat Enterprise Linux 6 as a downstream vendor. We use the name SUMU (simple usb multi user) to refer to the entire multiseat bundle and in this article I'm going to describe the current state of technologies surrounding multiseat, how that works on RHEL 6 and some practical observations.
COMPONENTS
To build a multiseat system you need a number of individual components:

- USB docking station like Plugable's UD-160-A or a combination of USB video card and stand alone USB hub. It is also possible to use USB docking stations from other vendors but I'm not aware of anyone who did it.
- udlfb - a kernel driver for USB graphics adapters which use DisplayLink based chips. As of January 2011 udlfb.c is part of the mainline kernel tree and is on track for 2.6.38. On RHEL6 this can easily be built as a stand alone module. There are no issues with this package. We also use a custom patch that will draw the string "fbX" onto the green screen. This is useful for easier identification of the display. The patch can be found here.
- Xorg - this is the standard graphics server on Linux. In RHEL 6 we have xorg-x11-server-Xorg-1.7.7-26 which works perfectly in a multiseat environment.
- xorg-x11-drv-fbdev with extensions - Xorg driver based on the fbdev driver. The extensions add support for the X DAMAGE protocol. This is a temporary solution until Xorg adds support for the damage protocol. Our package is called xorg-x11-drv-fbdev-displaylink to avoid conflict with the stock package provided by the distribution and it installs the files in /usr/local. You can also change the compiler flags and produce a binary under a different name (say displaylink_drv.so instead of fbdev_drv.so).
-
GDM with multiseat support - GDM will manage multiple local displays and has the ability to add/remove displays dynamically. This functionality is present in versions up to 2.20 and since RHEL6 includes gdm-2.30.4-21.el6 this is a tough choice. There are several possibilities:
- Use older GDM, preferably from a previous RHEL release. This gives you a tested piece of software and as long as the previous release is maintained you have (at least some) opportunity of fixing bugs in this code base. However this conflicts with current GDM in the distro which is also integrated with ConsoleKit, Plymouth and PulseAudio.
- Use GDM and ConsoleKit that are available in RHEL6 and apply the multiseat patches available at https://bugs.freedesktop.org/show_bug.cgi?id=19333 and http://bugzilla.gnome.org/show_bug.cgi?id=536355. Those patches are quite big (around 3000 lines each) and are not yet fully integrated upstream. They also conflict with custom patches that Red Hat is shipping into these packages. Your patched packages will also conflict with the stock distro packages and you will not receive any support for that. Since ConsoleKit seems like fairly important application I'd not recommend modifying it.
- Use another display manager that can handle multiple displays. https://help.ubuntu.com/community/MultiseatX suggests to use KDM instead of GDM. As far as I can tell the configuration is only static and this can break any time due to the fact that USB device discovery is unpredictable and unreliable. It also lacks an alternative for gdmdynamic according to http://lists.kde.org/?l=kde-devel&m=129898381127854&w=2 which makes it a no-go for plug-and-play multiseat support. There are other less popular display managers but I haven't spend much time in research.
- Just for the record it is also possible that one writes a custom display manager for multiseat operations. This sounds like an overkill and there are many factors which need to be taken into account. If you have enough resources and knowledge to write a display manager you'd better give upstream a hand instead of reinventing the wheel.
- A GDM theme - since the GDM version we're using requires a theme which is missing in RHEL6 this is also provided as a separate package. A GDM theme is an XML file plus some images.
- udev rules, scripts and config files - this is the glue between all the other components. Their primary job is to group the display-mouse-keyboard pairs for a given seat and start the display with the appropriate configuration settings. We also have support for PulseAudio.
RHEL6 SPECIFICS
For detailed description of multiseat configuration take a look at http://plugable.com/2009/11/16/setting-up-usb-multiseat-with-displaylink-on-linux-gdm-up-to-2-20/ or at our source code. I'm going to describe only the differences in RHEL6.
GDM, udlfb and xorg-x11-drv-fbdev-displaylink need to be compiled and installed on the system.
To build an older GDM on RHEL6 you will need to adjust some of the patches in the src.rpm package to apply cleanly and tweak the .spec file to your needs. This also includes using the appropriate version of ltmain.sh from the distro.
The udev rules and scripts are slightly different due to the different device paths in RHEL6:
SYSFS{idVendor}=="17e9", SYSFS{bConfigurationValue}=="2", RUN="/bin/echo 1 > /sys%p/bConfigurationValue"

ACTION=="add",    KERNEL=="fb*", SUBSYSTEM=="graphics", SUBSYSTEMS=="usb", PROGRAM="/usr/bin/sumu-hub-id /sys/%p/device/../", SYMLINK+="usbseat/%c/display",  RUN+="/etc/udev/scripts/start-seat %c"
ACTION=="remove", KERNEL=="fb*", SUBSYSTEM=="graphics", RUN+="/etc/udev/scripts/stop-seat %k"

KERNEL=="control*", SUBSYSTEM=="sound", BUS=="usb", PROGRAM="/usr/bin/sumu-hub-id /sys/%p/device/../../../../", SYMLINK+="usbseat/%c/sound"
KERNEL=="event*", SUBSYSTEM=="input", BUS=="usb", SYSFS{bInterfaceClass}=="03", SYSFS{bInterfaceProtocol}=="01", PROGRAM="/usr/bin/sumu-hub-id /sys/%p/device/../../../../", SYMLINK+="usbseat/%c/keyboard", RUN+="/etc/udev/scripts/start-seat %c"
KERNEL=="event*", SUBSYSTEM=="input", BUS=="usb", SYSFS{bInterfaceClass}=="03", SYSFS{bInterfaceProtocol}=="02", PROGRAM="/usr/bin/sumu-hub-id /sys/%p/device/../../../../", SYMLINK+="usbseat/%c/mouse",    RUN+="/etc/udev/scripts/start-seat %c"
We also use only /dev/event* devices for both mouse and keyboard.
The sumu-hub-id script returns the string busX-devY indicating the location of the device:
#!/bin/bash
if [ -d "$1" ]; then
    echo "bus$(cat $1/busnum)-dev$(cat $1/devnum)"
    exit 0
else
    exit 1
fi
USB device numbering is unique per bus and there isn't a global device identifier as far as I know. On systems with 2 or more USB buses this can lead to mismatch between devices/seats.
For seat/display numbering we use the number of the framebuffer device associated with the seat. This is unique, numbers start from 1 (fb0 is the text console) and are sequential unlike USB device numbers. This also ensures easy match between $DISPLAY and /dev/fbX for debugging purposes.
Our xorg.conf.sed template uses evdev as the input driver. This driver is the default in RHEL6:
Section "InputDevice"
    Identifier "keyboard"
    Driver      "evdev"
    Option      "CoreKeyboard"
    Option      "Device"        "/dev/usbseat/%SEAT_PATH%/keyboard"
    Option      "XkbModel"      "evdev"
EndSection

Section "InputDevice"
    Identifier "mouse"
    Driver      "evdev"
    Option      "CorePointer"
    Option      "Protocol" "auto"
    Option      "Device"   "/dev/usbseat/%SEAT_PATH%/mouse"
    Option      "Buttons" "5"
    Option      "ZAxisMapping" "4 5"
EndSection
We also use a custom gdm.conf file to avoid conflicts with stock packages. Only the important settings are shown:
[daemon]
AlwaysRestartServer=false
DynamicXServers=true
FlexibleXServers=0
VTAllocation=false

[servers]
0=inactive
AlwaysRestartServer=false is necessary to avoid a bug in Xorg. See below for issues description.
Audio is supported by setting $PULSE_SINK/$PULSE_SOURCE environment variables using a script in /etc/profile.d which executes after login.
SCALABILITY AND PERFORMANCE
Maximum seats:
The USB standard specifies a maximum of 127 USB devices connected to a single host controller. This means around 30 seats per USB controller depending on the number of devices connected to a USB hub. In practice you will have hard time finding a system which has that many port available. I've used Fujitsu's TX100 S1 and TX100 S2 which can be expanded to 15 or 16 USB ports using all external and internal ports and additional PCI-USB extension card.
While larger configuration are possible by using more PCI cards or intermediate hubs those are limited by the USB 2.0 transfer speed (more devices on a single hub, slower graphics) and a bug in the Linux kernel.
Space and cable length:
USB 2.0 limits the cable length to 5 meters. On the market I've found good quality cables running 4.5 meters. This means that your multiseat system needs to be confined is small physical space due to these limitations. In practice using medium sized multiseat system in a 30 square meters space is doable and fits into these limits. This is roughly the size of a class-room in a school.
You can of course use daisy chaining (up to 5 hubs) and active USB extension cords (11 meters) or USB over CAT5 cables (up to 45 meters) but all of these interfere with USB signal strength and can lead to unpredictable behavior. For example I've see errors opening USB devices when power is not sufficient or too high. Modern computer systems have built in hardware protection and shut off USB ports or randomly reboot when the current on the wire is too strong. I've seen this on a number of occasions and the fix was to completely power off and unplug the system then power it on again.
Also don't forget that USB video consumes a great deal of the limited USB 2.0 bandwidth. Depending on the workload of the system (e.g. office applications vs. multimedia) you could experience slow graphical response if using extension cords and daisy chaining.
Performance:
For regular desktop use (i.e. nothing in particular) I'd recommend using 32bit operating system. On 64bit systems objects take a lot more memory and you'll need 3-4 times more for the same workload as on 32bit. For example 16 users running Eclipse, gnome-terminal and Firefox will need less that 8GB of memory on 32bit and more than 16GB on 64bit. Python and Java are particularly known to use much more memory on 64bit.
Regular desktop usage is not CPU intensive and a modern Xeon CPU has no issues with it. One exception is Flash which always causes your CPU to choke. On multiseat that becomes even a bigger problem. If possible disable/remove Flash from the system.
Multiseat doesn't make any difference when browsing, sending e-mail, etc. You shouldn't experience issues with networking unless your workload doesn't require hi-speed connection or your bandwidth is too low. If this is the case you'd better use the USB NICs available in the docking stations and bond them together, add external PCI NICs or upgrade your networking infrastructure.
Disk performance is critical in multiseat especially because it affects the look and feel of the system and is visible by the end users. It is usually good practice to place /home on a separate partition and even on a separate disk. Also consider disabling unnecessary caching in user space applications such as Firefox and Nautilus (thumbnails and cache).
On a system with 2 x 7,2K RPM disks in BIOS RAID1 configuration and a standard RHEL6 installation (i.e. no optimizations configured) where /, swap and /home are on the same RAID array we have 15 users using GNOME, gedit, Firefox, gnome-terminal and gcc. The performance is comparable to stand alone desktop with occasional spikes which cause GNOME to freeze for a second or two. It is expected that disabling unnecessary caching will make things better.
Depending on the workload (reads vs. writes) you should consider different RAID levels, file system types and settings and changing disk parameters. A good place to start is the "Storage Administration Guide" and "I/O Tuning Guide" at http://docs.redhat.com.
KNOWN ISSUES
- Bug 28682 - input drivers support limited device numbers (EVDEV_MINORS is 32) - this bug will block you from adding more than 32 input devices of the same type. For multiseat that means 32 devices which are handled by the event driver which includes mice, keyboards, joystick and special platform events such as the Reboot/Poweroff buttons. This limits the available seats to around 15.
- Bug 679122 - gnome-volume-control: Sound at 100% and no sound output - upon first login the user will not hear any sound regardless of the fact that the volume control application shows volume is at 100%.
- Bug 682562 - gnome-volume-control doesn't respect PULSE_SINK/PULSE_SOURCE - the volume control application will not behave correctly and may confuse users.
-
Xorg will cause 100% CPU usage after logout - this is due to several factors. The initial multiseat configuration had a problem with input duplication. This was fixed by removing "-sharevts -novtswitch" from the X start line and substituting a specific VT - "vt07".
This works fine unless one of the users logs out of their GNOME session. After that GDM will kill and restart it's process and new Xorg process will be spawned. The restarted instance will loop endlessly executing the following code:
If you search on the Internet you will find plenty of bug reports related to this code block. The problem is in Xorg which doesn't properly handle the situation where it can't take control over the terminal. The solution is to not restart Xorg after user session ends. This is done by setting AlwaysRestartServer=false in gdm.conf.
ioctl(5, TCFLSH, 0x2) = -1 EIO (Input/output error) setitimer(ITIMER_REAL, {it_interval={0, 20000}, it_value={0, 20000}}, NULL) = 0 clock_gettime(CLOCK_MONOTONIC, {247, 684817842}) = 0 clock_gettime(CLOCK_MONOTONIC, {247, 684921278}) = 0 setitimer(ITIMER_REAL, {it_interval={0, 0}, it_value={0, 0}}, NULL) = 0 select(256, [1 3 5 13 14 15 16], NULL, NULL, {409, 254000}) = 1 (in [5], left {409, 253990}) ioctl(5, TCFLSH, 0x2) = -1 EIO (Input/output error) -
No integration with SELinux and ConsoleKit - while configuring SELinux in Permissive mode is easy workaround there's no easy workaround for ConsoleKit.
Newer GDM versions register the user session with ConsoleKit and integrate that into the desktop. Missing integration means that some things will fail. For example NetworkManager will not allow the user to connect to a VPN connection because it thinks this user is not logged in:
** (nm-applet:1168): WARNING **: <WARN> activate_vpn_cb(): VPN Connection activation failed: (org.freedesktop.NetworkManager.PermissionDenied) No user settings service available - No ACLs for external USB flash drives - this is missing upstream and is supposed to land in ConsoleKit. When a user plugs their USB flash drive on a multiseat system GNOME will try to mount it automatically. If there are multiple users logged in this will either fail or all of them will be able to access the flash drive.
PICTURES AND VIDEO
Pictures from one of our deployments can be found on Facebook (no login required): http://www.facebook.com/album.php?aid=54571&id=180150925328433. A demonstration video from the same deployment can be found at http://www.youtube.com/watch?v=7GYbCDGTz-4
If you are interested in commercial support please contact me!
FUTURE
In the open source world everything is changing and multiseat is no exception. While GDM and ConsoleKit patches are not yet integrated upstream there's a new project called systemd which aims at replacing the SysV init scripts system. It already has several configuration files for multiseat and I expect it will influence multiseat deployments in the future. Systemd will be available in Fedora 15.
There are comments.
Page 2 / 2